Managing Users
The Users page of a partner or customer admin account contains a list of all the users in that account. All users in a customer account may interact with each other using various Mitel applications after CloudLink integration is enabled on these applications.
To integrate, enable, and manage MiVoice Business features from the Mitel Administration see MiVoice Business Integration in this guide. You could also refer to Mitel Administration for MiVoice Business Solution Guide on Mitel Document Center for detailed information.
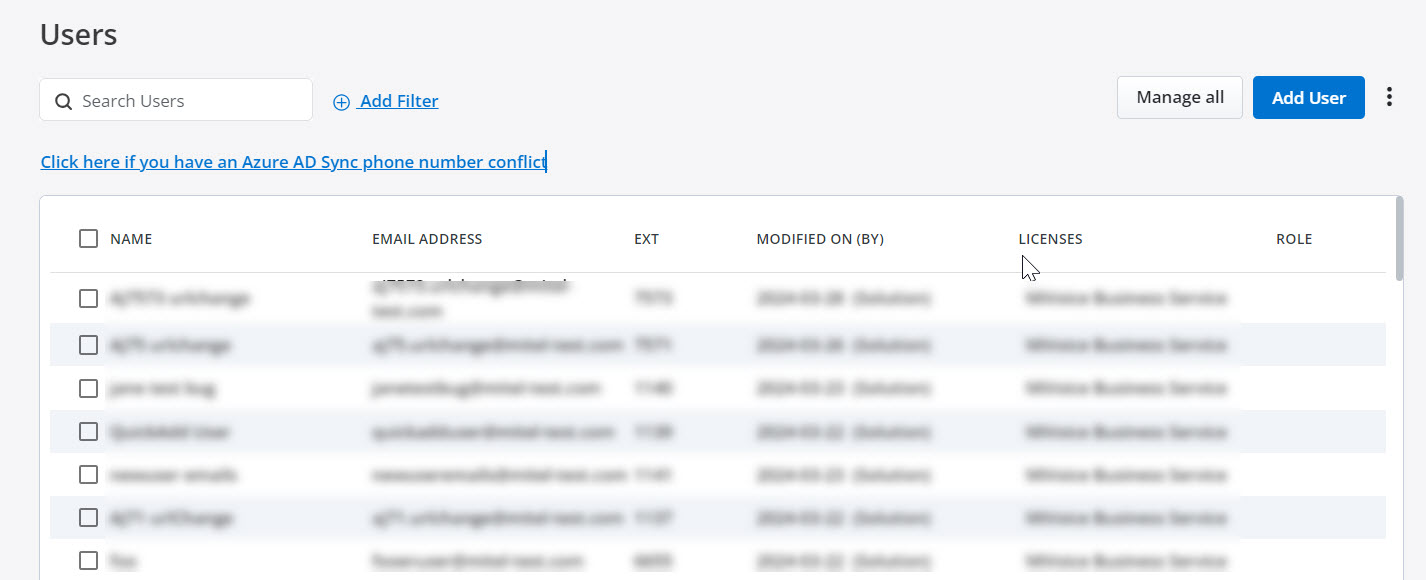
The Users page displays the list of users, user's email address, the extension numbers, modified on and by, configured licenses, and the role assigned to the user.
The Users page enables Mitel Partners and Account Admins of a customer account to add, edit, view, and search for a user; enable or disable administrative rights for a user; reset a user's password; resend welcome email to a user; assign products and licenses to a user; and delete a user from that account.
To access the Users page of an account, do the following:
If you are logged in as a Mitel Partner:
-
Click Accounts from the left navigation menu. The list of users is displayed.
-
Click the User to access the account.
If you are logged in as a customer Account Admin:
-
Click and expand User Management from the left navigation menu, click Users. The list of users for this account is displayed.
-
Click the User to access the account.
Add User
The customer Account Admin can add users to that account. To add a new user, do the following:
-
Log into the Mitel Administration as an Account Admin.
-
Click and expand User Management from the left navigation menu.
-
Click Users. The Users page opens.
-
Click the Add User button. The New User form is displayed.
-
Enter the First Name, Last Name, and Email address. These fields are mandatory.
Enter a valid email address for the user in the Email field. Ensure that you do not enter an email address already assigned to an existing user in the customer account
Note: If an error One or more of the attribute values are already in use is displayed while adding a user see, the Knowledge Based article (HO4817 CloudLink - Active Directory Managing disabled active directory accounts). - Enter a Mobile Number for the user. Click the country code field to select the country code from the drop down menu.
- Select an SMS Number for the user from the drop down menu. You can click on the search icon to search for a number.
You have to enable the Twilio integration and User Numbers option to be able to assign SMS numbers to users. To do this, navigate to Integrations and Apps > Twilio.
- Set the Account Admin toggle to on to enable administrative rights for the user. This field is optional.
You can also enable administrative rights for the user from the User's edit page, select Account Admin in the Role drop-down list. To disable the administrative rights for a user, select User in the Role drop-down list.
-
Click Create. A welcome email is sent to the user's email address. Meanwhile, the Account Admin can assign licenses to the user in the User Edit page.Note: You can choose to resend the CloudLink account welcome email to the user, by clicking the Resend the welcome email hyperlink in the User Edit page.
You cannot order users by SMS Number.
You can add users in bulk to a customer account in Mitel Administration by using the bulk import feature. For more information, see Bulk Import of Users.
Filter Users
The + Add Filter ![]() button in the Users page enables the Account Administrator or Mitel Partner to filter the list of users in an account by user type and the products for which they have licenses to. To filter, click the +Add Filter button. A drop-down list is displayed.
button in the Users page enables the Account Administrator or Mitel Partner to filter the list of users in an account by user type and the products for which they have licenses to. To filter, click the +Add Filter button. A drop-down list is displayed.
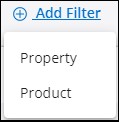
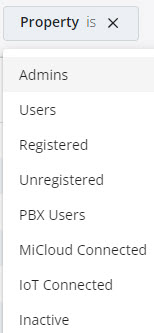
To filter the list of users by user type, select Property. From the list of properties that are displayed, choose any type of property. To view a list of administrative users, all users, registered or unregistered users, PBX users, MiCloud or IoT connected users, click the respective options from the Property list: Admins, Users, Registered, Unregistered, PBX Users, MiCloud Connected, IoT Connected, or Inactive.
To filter the list of users based on the products for which they have license to, select Product. The products for which a user is licensed are displayed under the Product list.
To filter the list of users based on the SMS numbers they have been assign to, select SMS Number, enter the SMS number in the Filter for SMS Number field and click  .
.
If you search by SMS Number, you cannot use the Search Users option. If you have used the Search Users option and you apply the SMS filter, the Search Users is disabled.
You cannot use the SMS Number filter and the Property filter at the same time. If the SMS Number filter is applied, the Property filter is not available. If the Property filter is applied, the SMS Number filter is not available.
Search for Users
In the Search bar, type the name, the email address, or the EXT numbers of the user you are searching for. The Users page displays a list of matching users as you type the letters.
Import Users
To add users in bulk to a customer account, select the customer account > click User Management > Users. Click  and click Import Users. For more information about adding users in bulk to a customer account, see Bulk Import of Users.
Edit User
To edit the details of a user, click the user and edit the user details in the form that opens.
You can edit the Name, First Name, Last Name, Email address, and mobile number of a user; assign MiTeam Meetings license to a user (if applicable); enable or disable the Account Admin toggle; resend the welcome email to a user; reset the password of an Account Admin; or Delete a user.
Click Save to save the changes or click Cancel to discard the changes.
- If a user is created from an external source (such as from SCIM, PBX, or any other source except the Accounts app), some of the fields may be disabled for edit in the Accounts app. If any change is made in the source, the data may be overwritten on the next sync.
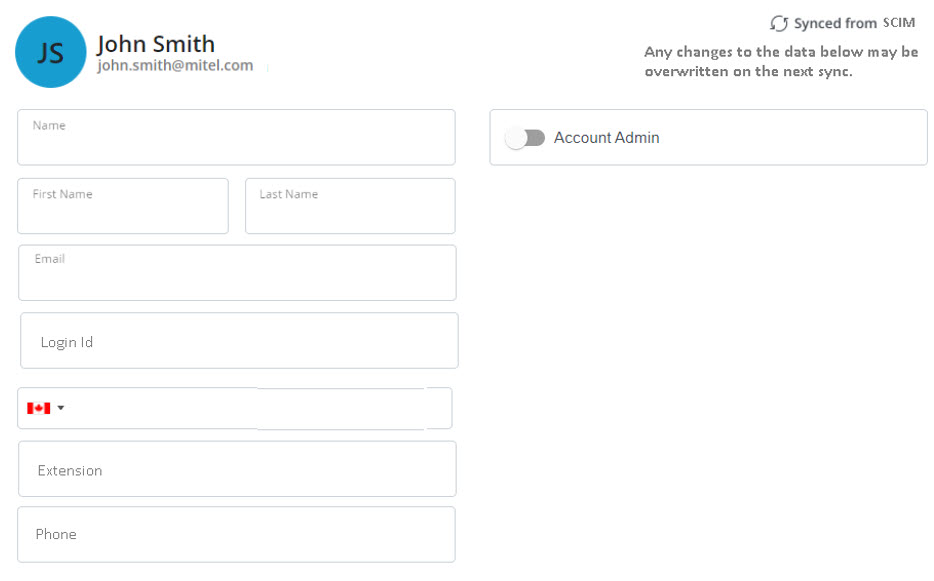
- If a user is imported from SCIM, the User Edit page displays an Advance section, which contains the SCIM data for users.
-
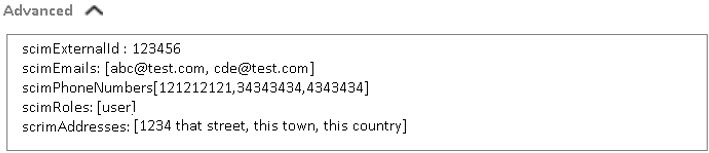
When you add the MiVoice Business service to the user, the username field is enabled, and can be updated. If the username for the user is updated in the CloudLink account at this initial configuration of MiVoice Business service, the username entered in the Username field is synced to MiCollab and the MiVoice Business PBX. However, if the username is edited later in the CloudLink account, the updated username is not synced to MiCollab and MiVoice Business, or vice versa.
Assign a User as Account Admin
To enable administrative rights for a new user, slide the Account Admin toggle button to the right in the user details form when you create the user. The toggle button turns blue when a user is set as an Account Admin. To enable or disable administrative rights for a user, click the user from the Users page and in the user details form that opens, slide the Account Admin toggle button respectively to the right or to the left.
Reset Passwords
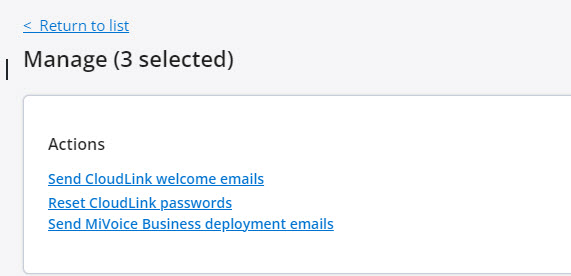
To reset the password of all users in a customer account at once, click the Manage all option and from the panel that opens, click Reset passwords for all. To reset the password of selected users, select the users from the Users page and do either of the following.
- Click the icon. From the panel that opens, click Reset CloudLink passwords.
- Click the Manage (x) option and from the panel that opens, click Reset CloudLink passwords.Note:
If you are selecting specific users, the Manage (x) option will reflect the number of users chosen.
An email containing the Reset Password link is sent to the user’s registered email address.
-
The Reset Password email is sent only to users who have registered their details with Mitel and created an account.
-
If SSO integration is applied to an account, the Reset Password function is deferred to the IDP of the customer.
Send Welcome Email
To send a welcome email to all the users in the customer account at once, do either of the following:
- Click the icon from the Users page and from the panel that opens, click Send CloudLink welcome emails to all or,
- Click the Manage all option from the Users page, and from the panel that opens, click Send CloudLink welcome emails to all.
To send a welcome email to selected users, select the users from the Users page and do either of the following:
- Click the icon from the Users page and from the panel that opens, click Send CloudLink welcome emails or,
- Click the Manage (x) option from the Users page, and from the panel that opens, click Send CloudLink welcome emails. Note:
If you are selecting specific users, the Manage (x) option will reflect the number of users chosen.
Send MiVoice Business deployment emails
When MiVoice Business Services is applied to a user account (either automatically to existing users or when new users are created), Users for the Customer Account are sent two " Welcome to MiVB" emails. These are called MiVoice Business Service Deployment Emails. The Administrator determines when the emails are sent by selecting user(s) or sending emails to all users with MiVoice Business Service enabled.
-
Log into the Mitel Administration as an Account Admin.
-
Click and expand User Management from the left navigation menu.
-
Click Users. The Users page opens.
-
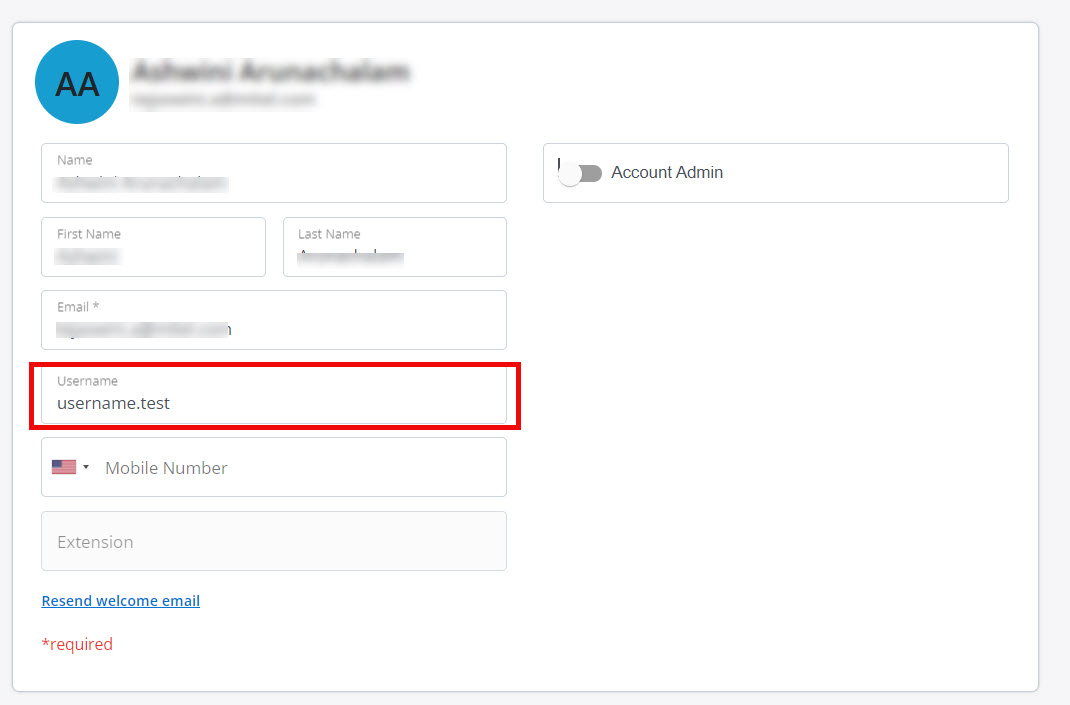
Select the user(s) from the Users list. Click Manage (x).
Note:If you are selecting specific users, the Manage (x) option will reflect the number of users chosen.
-
Click Send MiVoice Business deployment emails to send the deployment email the selected users.
-
Click Close. The selected end user(s) are sent two "Welcome to MiVB" emails with deployment and password details.Note: The first email contains User Portal details, Phone details and MiCollab Client details (if applicable). The second email contains passwords/phone pin.Note:
MiVoice Business deployment emails will not be sent to users with voicemail enabled when the Open Integration Gateway (OIG) is a Network Element in the customer deployment along with MiCollab for Mitel Administration.
To prevent this issue, ensure that the OIG is not included in the deployment cluster for customers who use Mitel Administration for user provisioning of MiVoice Business Solutions.
Manage MiTeam Meetings License
Clicking the Manage option in the Users page of a customer account opens a panel that displays the number of MiTeam Meetings licenses available for that account and options, to assign MiTeam Meetings license to users, to unassign MiTeam Meetings license of existing users, to send welcome emails to all users, and reset the password of users.
- the account has MiTeam Meetings integration turned on and MiCollab integration turned off.
- the account has at least one MiTeam Meetings subscription/order assigned to it.
- the account is not a Partner Account.
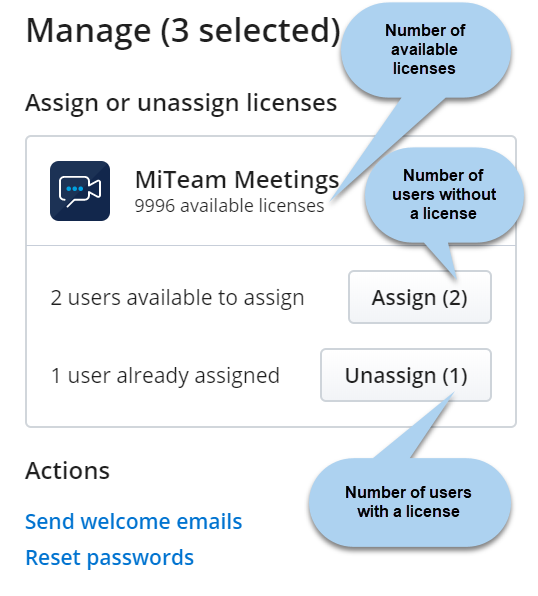
- To assign MiTeam Meetings license to all the users in the customer account at once, click the Manage option, and click Assign all from the panel that opens.
- To unassign MiTeam Meetings license of all the users in the customer account at once, click the Manage option, and click Unassign all from the panel that opens.
- To assign MiTeam Meetings license to selected users, select the users from the Users page, click the Manage option, and click Assign from the panel that opens.
- To unassign MiTeam Meetings license to selected users, select the users from the Users page, click the Manage option, and click Unassign from the panel that opens.
Bulk User Settings
To assign SMS Numbers to a selected number of users in bulk do the following:
- From the Users page, select the check boxes associated with the users you want to assign SMS Numbers.
- Click Manage (x). The Manage page is displayed.
- In the Bulk User Settings panel, click
 next to Twilio SMS Numbers. The Assign SMS Numbers pop-up window is displayed.
 - Click the Overwrite SMS numbers for selected users drop down menu and select Assign all.
If you want to unassign all SMS numbers to the selected users, click Unassign all.
- Click Save.
If the number of users is more than the available SMS numbers, then an error message is displayed and the Assign all option is not available.
Delete User
-
From the Users list page:
-
Select the check box associated with the user(s) whom you want to delete, and click the
icon. -
From the panel that opens, click Delete users. Delete Selected User(s)? dialog box is displayed.
-
Type the word delete, and click Delete.
-
- From the User details page:
-
Select the user from the Users page and scroll down to the bottom of the page.
-
Click Delete. Delete User dialog box is displayed.
-
Type the word delete, and click Delete.
-
The user will be deleted.
- You cannot delete a Mitel Partner, or a user synced from MiCloud Connect.
- Deleting a user synced from a PBX will only remove the CloudLink account of the user and will not delete the user from the PBX. After deletion, the user will continue to be listed in the Users page of Mitel Administration. To add a CloudLink account to the user again, the Account Admin must send a welcome email to the user.
- Deleting the SCIM users synced from Azure Active Directory will only remove the CloudLink account of the user and will not delete the user from Azure Active Directory.
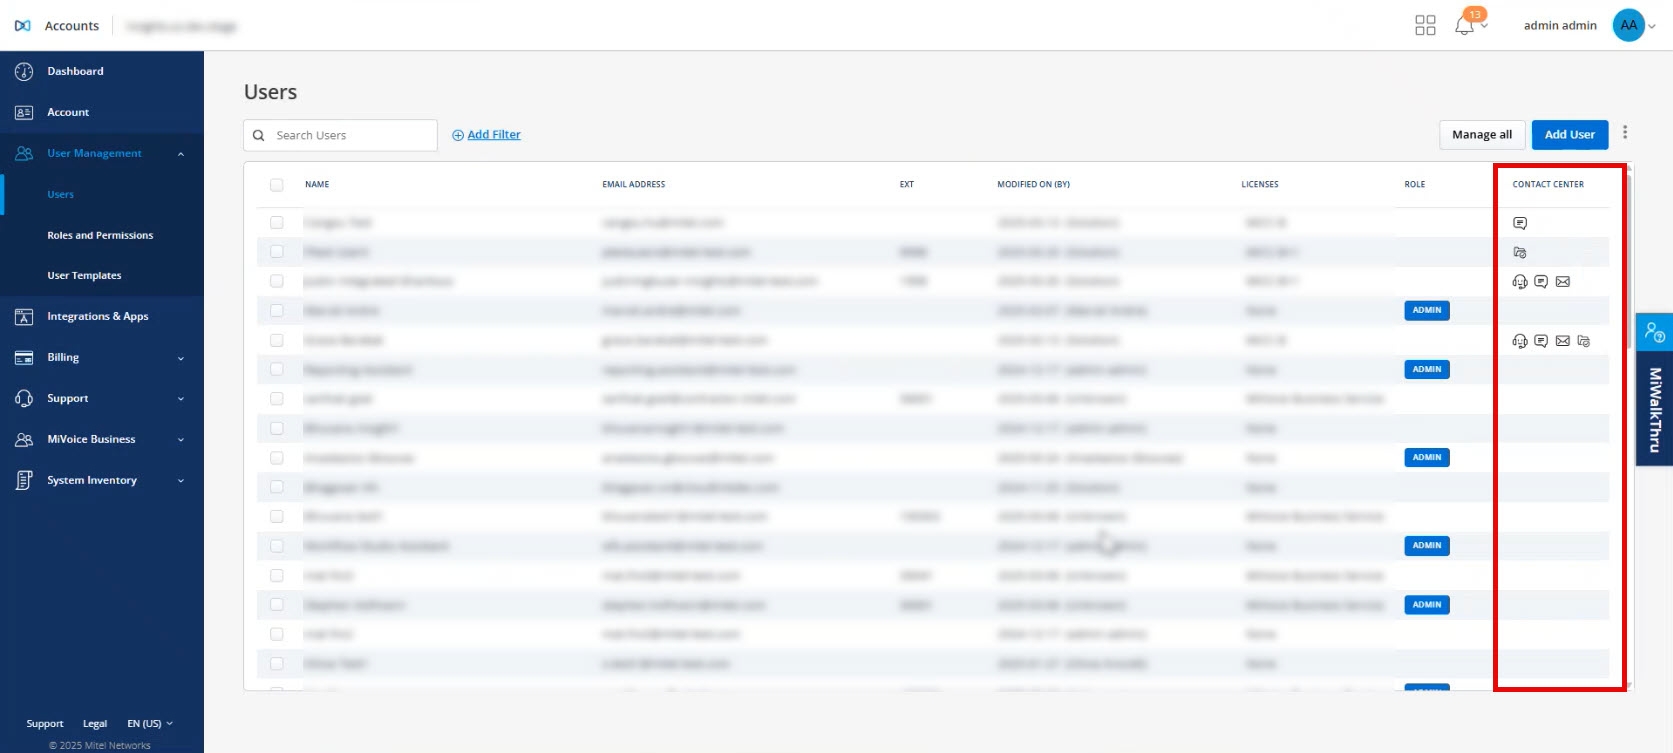
Show/hide Contact Center Column
The Show/hide Contact Center Column option allows authorized users to toggle the visibility of the Contact Center column. This column displays the Contact Center modalities each user is configured for in Mitel CX.
- Click the three vertical dots in the top right corner.
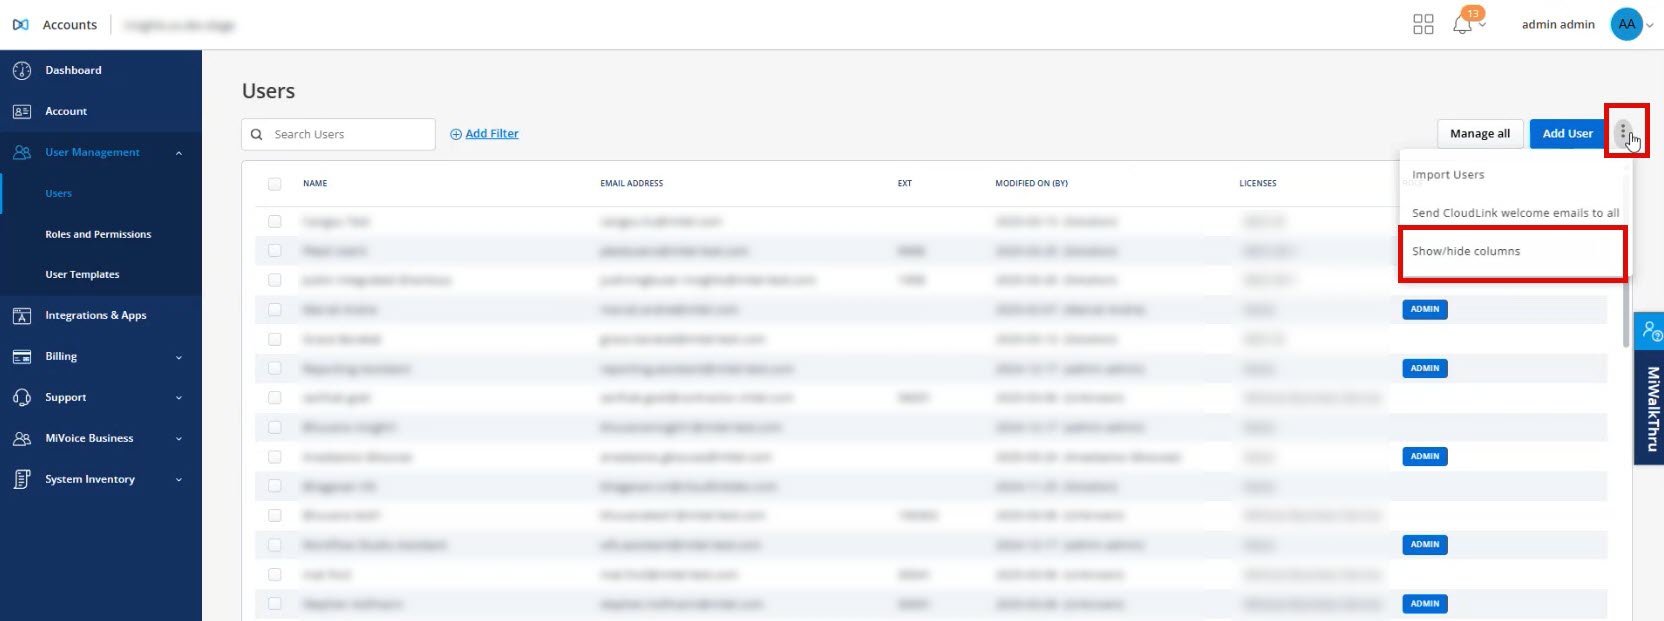
- Select Show/hide columns from the options menu.
The Show/hide columns pop-up displays.
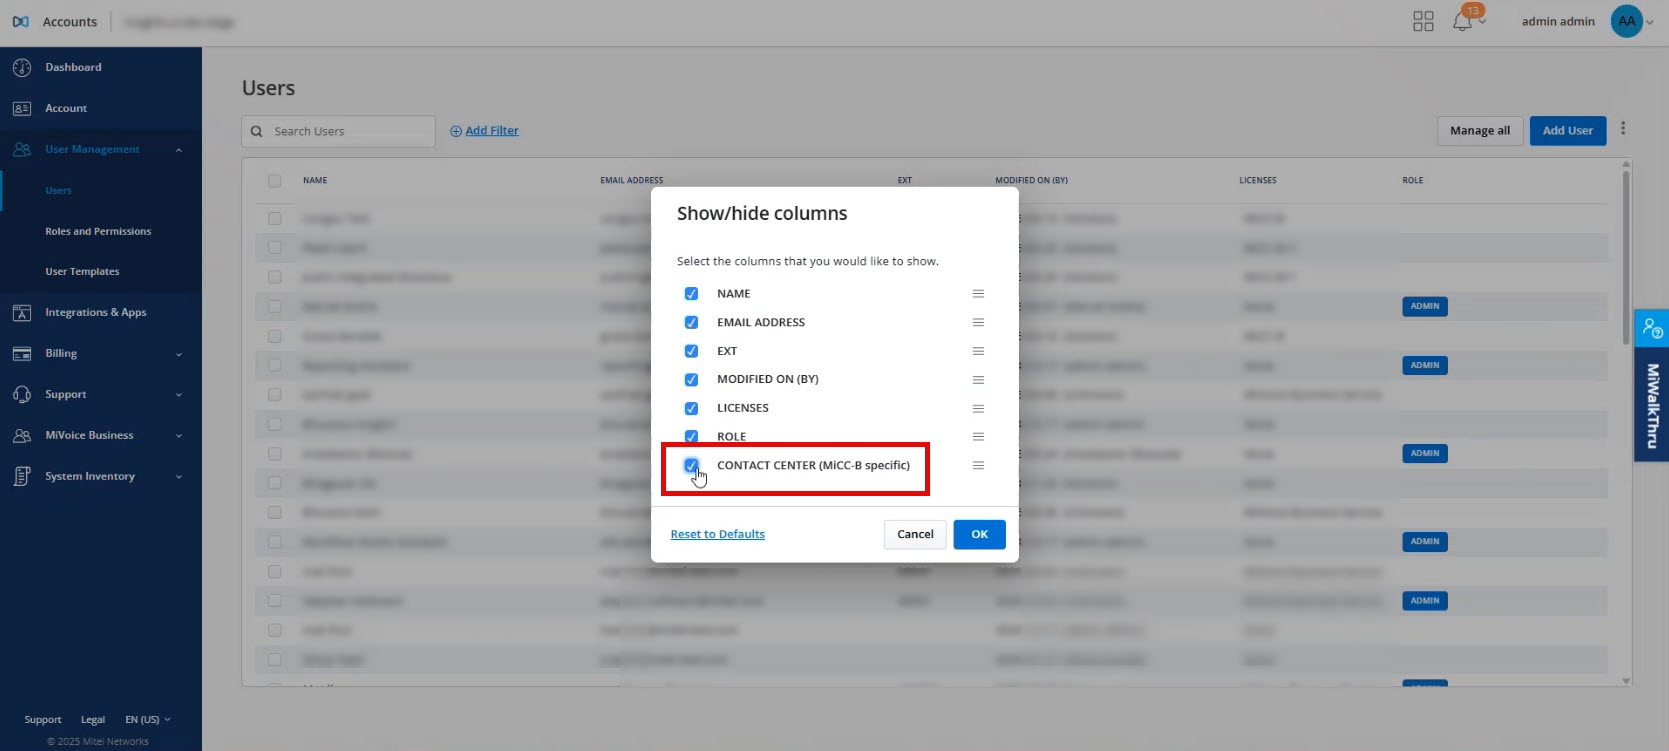
- Enable the Contact Center (Mitel CX specific) checkbox to show the Contact Center column, or disable it to hide the column.
- Click OK.
The Contact Center column is displayed to view the contact center modalities each user is configured for in Mitel CX.